Whether it's the school holidays, or you're just after a fun project to do at home, bungee cords are great for helping with organisation, storage, activities, and even science projects… like how to build a catapult using a bungee cord, because who doesn't want to know this?
What you'll need:
- Two x 7.5-inch-long pieces of wood
- Three x 14-inch-long pieces of wood
- Two x 24-inch-long pieces of wood
- One x 28-inch-long piece of wood
- One x 10.5-inch-long piece of wood
- Two x large, strong eye hooks
- 20-30 long screws or nails
- A cup (to hold your projectile)
- Four x 20-24-inch bungee cords
- A dowel or pipe that is about one-inch thick and 12 inches long
- Power drill
- Power saw
- Chisel with mallet
- Square
1. Drill holes at the end of your wood
Grab your two 24-inch-long pieces of wood. On one end of the piece of wood, mark about 3.5 inches away from the edge. Then, drill a hole with a 1-inch diameter. Do this for both pieces of wood, so they're identical.

2. Mark and chisel the wood
Measure down 5.5 inches and 8 inches down from the end of the wood with the hole in, and mark them. Then, saw out the gap between the marks, sawing down only halfway, so there's a thick base. Use a chisel, and hammer out the excess wood.

3. Make your base
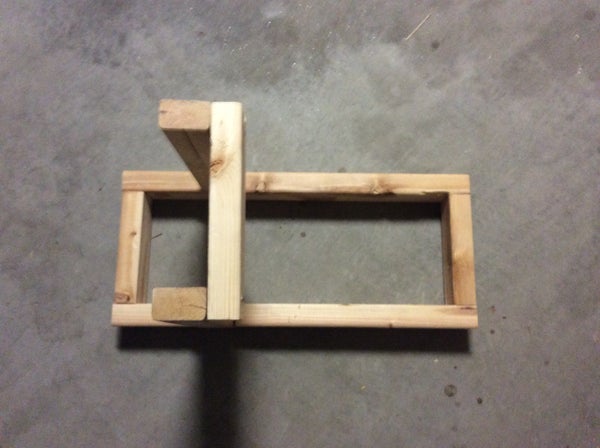
Next, make a base by screwing the 7.5-inch-long pieces of wood to the two 24-inch-long pieces of wood at the corners. Make sure that the 7.5-inch pieces are on the inside and that the 24-inch pieces are facing outwards, so that the marked areas are on the outside.

4. Attach the legs
With the base in place, next up, take two 14-inch pieces of wood, and make a mark 2.5 inches from the edges. Then, cut half way in and chisel any excess word out. Screw together the two 14-inch pieces of wood to the dints of the two 24-inch pieces of wood from the base.

5. Add a horizontal plank
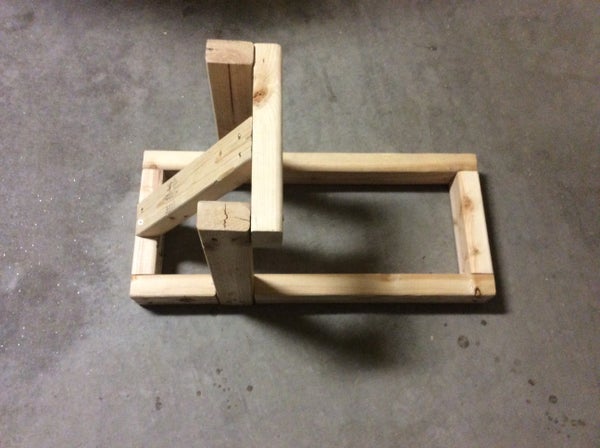
Next, take the 10.5-inch piece of wood, and drill it to the top of the 14-inch pieces to form a horizontal line. Make sure the plank lines up and that it lies attached on the inside.

6. Cut the angle
From there, take the third 14-inch piece of wood, and cut two angles on it so both ends can be drilled and attached to the base and the horizontal plank above. This will provide strength and support for the catapult.

7. Add the catapult slinger
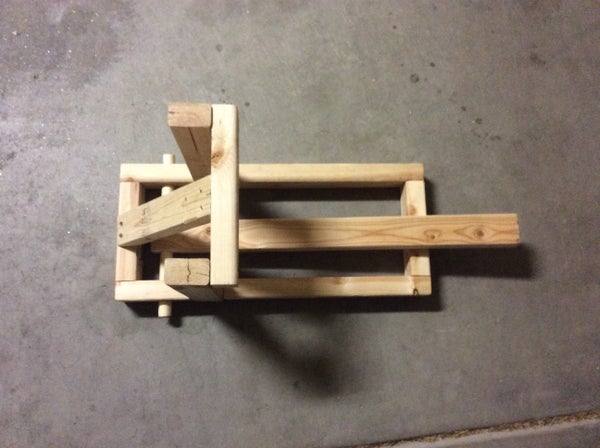
Grab the 28-inch piece of wood, and lay it out flat. Drill a hole through one end, through the side, all the way through, and make sure the hole itself is one-inch wide. Grab the dowel or pipe, and insert it through one side of the base, and then through the hole of the 28-inch piece of wood, so that it is central to the dowel. The dowel should then be inserted through the other side of the base. Make sure the 28-inch piece of wood is central and in line with the angled piece of wood above.

8. Drill in the eye hooks
Drill one eye hook to the bottom of the angled piece of wood – make sure it is facing the ground. Drill in another to the slinger piece of wood (the end of the 28-inch piece of wood), with the hook facing the end.
9. Paint and customise
Customise the catapult to whatever design you like. Paint it whatever colour you like, or even add patterns, stickers and text.
10. Attach the bungee cords and cup
Grab your bungee cords and bungee hooks , and attach them to the drilled-in eye hooks. Glue down your cup to the end of the slinger piece of wood, and voila, you have your homemade catapult ready for some fun physics experimentation.

Source: Instructables Workshop
0 Response to "Easy to Make Homemade Catapult With Wood and Nails"
Post a Comment